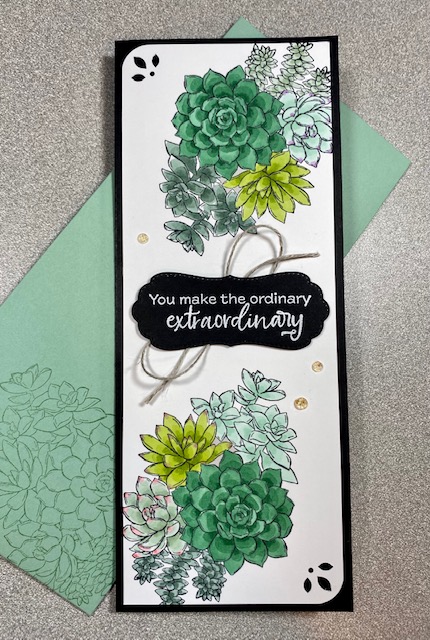
Here is a slimline card made with this amazing stamp set. You will love this color combination that is used on this card with the added extra touches on the corner of the card.

Supplies:
- Stamp Set(s): Simply Succulents (154480)
- Card Stock: Basic Black (121045), Basic White (159276), Mint Macaron (138337)
- Stampin’ Blends: Flirty Flamingo (154884), Granny Apple Green (154885), Mint Macaron (154889), Soft Succulent (155521), Shaded Spruce (154903), Pool Party (154894), Fresh Freesia (155518)
- Stamp Pad(s) and Ink(s): Memento (132708), Versamark (102283)
- Dies and Embossing Folder(s):Potted Succulents (154330)
- Embellishments: Genial Gems (155500), Linen Thread (104199)
- Tools:Detailed Trio Punch (146320), Heat Tool (129053), White Emboss Powder (Basics – 155554)
Measurements:
- Mint Macaron envelope: 8-½” x 10-⅛”
- Black card base: 7” x 8-¾”, scored in half at 3-½”
- 2 White layers (front and inside): 3-¼” x 8-½”
- Black scrap for sentiment
Card Instructions:
- Stamp the large succulent image in Memento on one of the white layers coming in from the top and bottom on opposite corners.
- Punch the other corners with the Detailed Trio Punch, both rounding and adding the cutout detail.
- Color the images with Stampin’ Blends. I found it easiest to color each succulent grouping with just the light and dark of one color and only add colored tips to a few.
- Adhere this layer to the front of the folded card base.
- Stamp sentiment in Versamark ink on black scrap, pour white embossing powder over, tap off and heat. Die cut with label die from Potted Succulents.
- Run Stamp ‘n Seal + in a short line in the center and place a piece of Linen Thread, looping it back and forth.
- Add dimensionals to sentiment label and place over the twine
- Add Genial Gems to the front
- Stamp sentiment in Memento on the inside white layer, add the smallest succulent stamp image and then round and detail punch the opposite two corners. Adhere to the inside.
Envelope Instructions:
- With the cardstock in portrait orientation, score at 2-½” and 6-⅜”
- Turn to portrait and score again ½” in from both sides
- Snip off all four corner “rectangles”
- Make angle cuts on all side tabs
- Fold and burnish all score lines
- Fold in the side tabs and fold up the largest of the two rectangles (this is the bottom)
- Glue the bottom piece on top of the side tabs
- Place a piece of Tear ‘n Tape along the top edge of the top flap for future use
- Decorate the front of the envelope with the large succulent stamp in Versamark ink or matching Mint Macaron Ink.
Place an order in January and get 10 FREE card tutorials emailed to you


Leave a Reply